COVID-19 Update - Data Clean offers disinfection services, effective against coronavirus and other pathogens.
Acrycell Tape
Applications
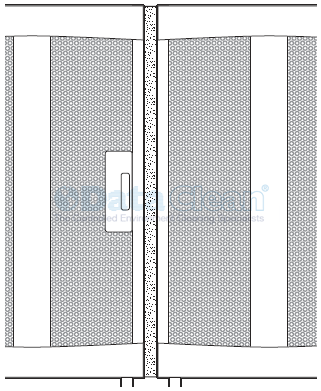
 Non-Particulating. Used to seal narrow openings between racks or other
hard-to-solve openings. Tape is adhesive on one side and self expands
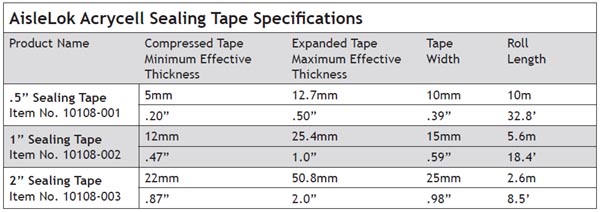
to roughly 225% of rolled thickness. Roll width and length vary by tape
thickness.
Specifications

Installation
2. Prepare surface before mounting Acrycell Sealing Tape by wiping with a damp cloth then use lint free towel to dry.
3. Once the surface is clean and dry, unroll the tape to the desired length and cut using scissors or cutting blade. Peel the backing off the Acrycell Sealing Tape to reveal the adhesive.
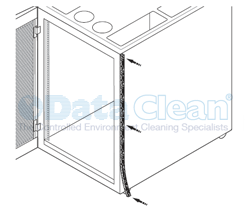
4. Attach tape by pressing the adhesive to the surface of one side of the gap while unrolling and pressing to attach the tape straight and secure.
NOTE: It may be preferable to peel the adhesive backing off as the tape is being applied to avoid the inadvertent adhesion to other surfaces.
5. At the end of the gap, cut the tape to fit. Any remaining tape stored for future use must be kept under pressure to prevent premature expanding. (Recommended storage is immediate shrink wrapping or securing the loose end by applying storage tape around roll to keep material under pressure).
6. Allow 1/2 to 1 hour for expansion of time released tape to form secure seal.
Unroll tape to desired length and cut using scissors or cutting blade.
Peel the backing off the Acrycell Sealing Tape to reveal the adhesive.
 |
Attach tape by pressing the adhesive side to the surface of one side of the rack while unrolling and pressing.

At the end of the gap, cut the tape to fit. Allow 1/2 to 1 hour for tape expansion to form secure seal.

Contact your local Data Clean account manager for more information.
